
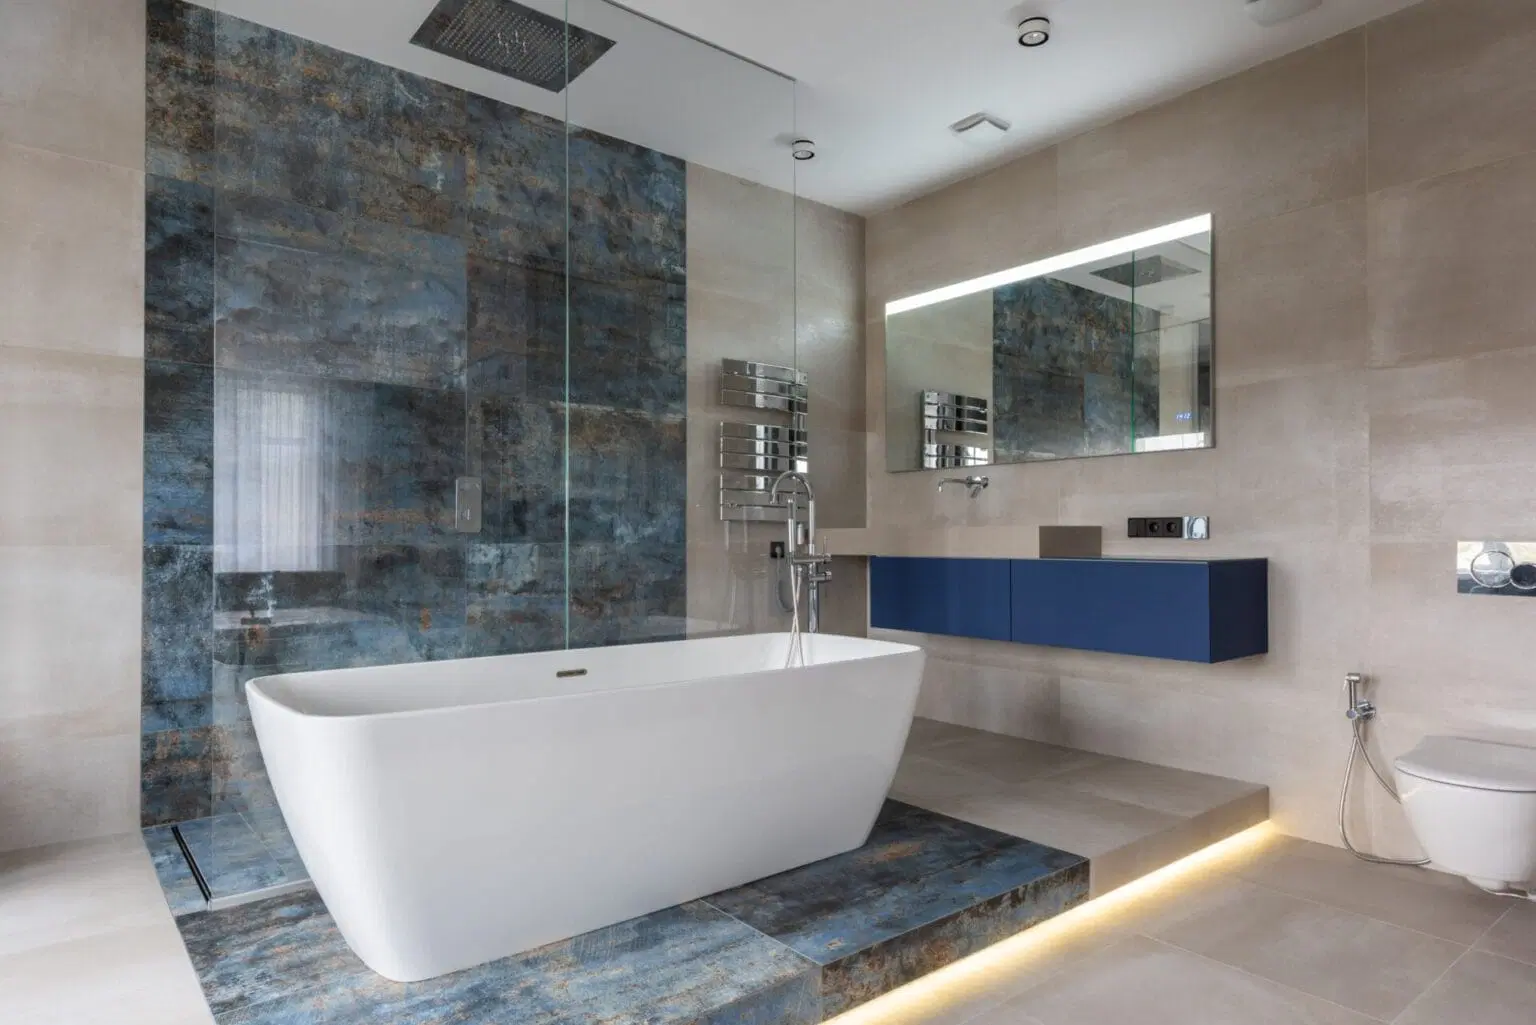
Most bathroom makeovers start with tiles and end with a light fitting chosen in a hurry. Flip that thinking and plan the two together, and the same room can look twice the size, feel far more stylish, relaxing and intentional.
In this blog, we explain how the right tiles and well-placed LED strip lighting can transform your bathroom. We cover which tile finishes and colours respond best to light, how strip lights work, what to look for in colour temperature and IP rating, and how to install LED strip lights neatly alongside your tiling. Along the way we also share examples from EMC’s tile collection and LED range to help you create a bathroom you will love using.
Why Tiles and Lighting Belong in the Same Plan
Tiles cover more of a bathroom than any other material, so they determine how light behaves in the room. A glossy wall bounces light around; a textured stone surface catches it and throws soft shadows. The same LED strip can look crisp and clinical against one tile and warm and natural against another.
That is why the best results come when you choose both at the same time. Lighting positions, cable routes and channels for aluminium profiles all need to be agreed before the first tile goes on the wall. Leave the lighting until later and you are left with surface-mounted fittings and visible cables. Plan it into the tile layout and the light looks as though it was always part of the room.
Think of the tiles as the stage and the lighting as the spotlight. Each one makes the other look better, and together they set the mood of the whole room.
Choosing Tiles That Work With Light
Not every tile reacts to light in the same way. Three things make the biggest difference: finish, colour and size.
Finish.
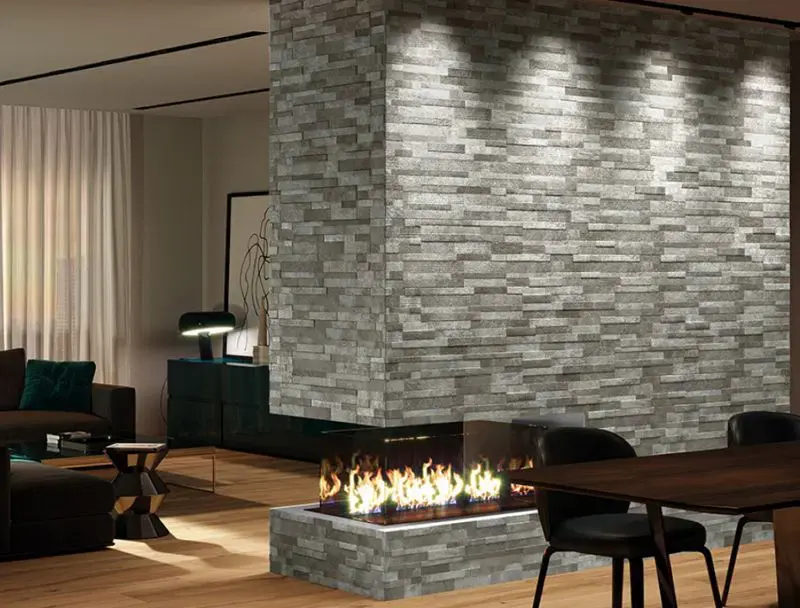
Gloss tiles and polished tiles reflect light, which makes a small bathroom feel brighter and bigger. They work brilliantly with a strip running along a ceiling recess or behind a mirror. Matt tiles absorb more light, giving a softer, calmer look with less glare. Textured tiles are the real stars of LED lighting: graze a strip across them from above or below and every ridge and groove comes alive. Our Cubics 3D effect wall tiles are a great example of this.
Colour.
Light changes how a tile colour reads. Green tiles feel rich and natural under warm light, while blue tiles look fresh and clean under a cooler tone. White tiles reflect the most light of all, so they suit a compact room, but they can look flat under harsh lighting. Natural looks such as travertine effect and wood effect tiles come into their own under a warm glow.
Size and Shape.
Large formats such as XL tiles mean fewer grout lines, so a wash of light reads as one calm, continuous surface. Smaller hexagon or chevron tiles create pattern and rhythm, which lighting can pick out on a feature wall. For a marble look that sparkles under LEDs, browse EMC’s marble effect tiles or The Room collection, which comes in polished and matt.
Whatever you choose, order free cut samples and look at them under the light you plan to use. A tile that looks perfect in a showroom can look quite different at night in your own space.
LED Strip Lighting Explained
An LED strip (also called LED tape) is a thin, flexible circuit board lined with tiny light chips, with an adhesive backing so it can be fixed almost anywhere. It is low-profile, energy efficient and long-lasting, which makes it ideal for tucking into the details of a tiled bathroom.
When you compare strip lights, these are the specs that matter:
- Chip type. Traditional SMD (surface-mounted device) strips use individual LEDs spaced along the tape, which can show as visible dots on a shiny tile. COB (chip-on-board) strips pack the chips so tightly that you get a smooth, continuous line of light.
- Light output. Measured in lumens per metre. Around 400 to 500 lumens per metre suits accent and mood lighting; brighter strips are better for task lighting at a mirror.
- Wattage. Quoted in watts per metre, and needed to size your power supply (more on that below).
- Strip width. Usually 5 to 12mm. The strip width must match the channel or profile you plan to fit it into.
- Strip voltage. Most bathroom-grade strips run at a safe low voltage, typically 12V or 24V DC.
As an example, EMC’s Premium LED Strip Tape from Integral LED is a COB strip rated IP65 with a 4000K cool white output. The manufacturer lists it as an 8mm tape giving 440 lumens from 4W per metre, and EMC sells it per metre in lengths from 1m up to an 8m reel.
Single Colour or Colour Changing?
The right type of strip depends on how you want the room to feel.
| Strip type | What it does | Best for |
|---|---|---|
| Single colour white | One fixed white LED tone, warm, natural or cool | Shower niches, vanity units, task lighting |
| Tunable white | Adjusts between warm white and cool white | Bright mornings, relaxing evenings |
| RGB | Mixes red, green and blue for millions of colours | Feature walls, fun family bathrooms |
| RGBW | RGBW adds a dedicated white channel to RGB | Colour changing effects plus a true white |
| Neon flex | A thick, diffused silicone strip with an even glow | Curves, bold lines, outdoor and wet areas |
If you love colour options, RGBW is usually the better buy. Standard RGB has to mix red, green and blue to fake white, which tends to look slightly blue or pink. An RGBW strip has a separate white chip, so you get colour changing scenes for a party and a clean white for everyday use. You will need a compatible controller and remote or app to switch between them.
For most bathrooms, though, a good single colour white strip is all you need. It is simpler to wire, cheaper per metre and gives that calm, hotel-style finish.
Colour Temperature: Setting the Mood
Colour temperature is measured in Kelvin (K) and has a huge effect on how your tiles look and how the room feels.
- Warm white (2700–3000K) gives a soft, golden, candle-like glow. It flatters skin tones and suits wood effect, travertine and warm beige tiles. Choose it for a cosy, spa-style mood.
- Natural or neutral white (around 4000K) is clean and balanced, showing colours close to how they look in daylight. It is a safe all-rounder and works well with marble, stone and grey tiles.
- Cool white (5000K and above) is crisp and bright, almost clinical. It can make white and blue tiles look very fresh, but too much of it can feel cold in a bathroom.
A useful rule is to match the light to the tile. Cool-toned tiles such as greys, whites and blues pair well with neutral or cool light, while warm tones such as creams, beiges, browns and greens look their best under warm light. If you cannot decide, use a neutral strip for the mirror and a warmer one for the accent features, each on its own switch.
Where Strip Lights Make the Biggest Impact
The secret is to light surfaces and architectural features, not the middle of the room. Here are the spots that transform a bathroom most.
Mirrors and Vanities.
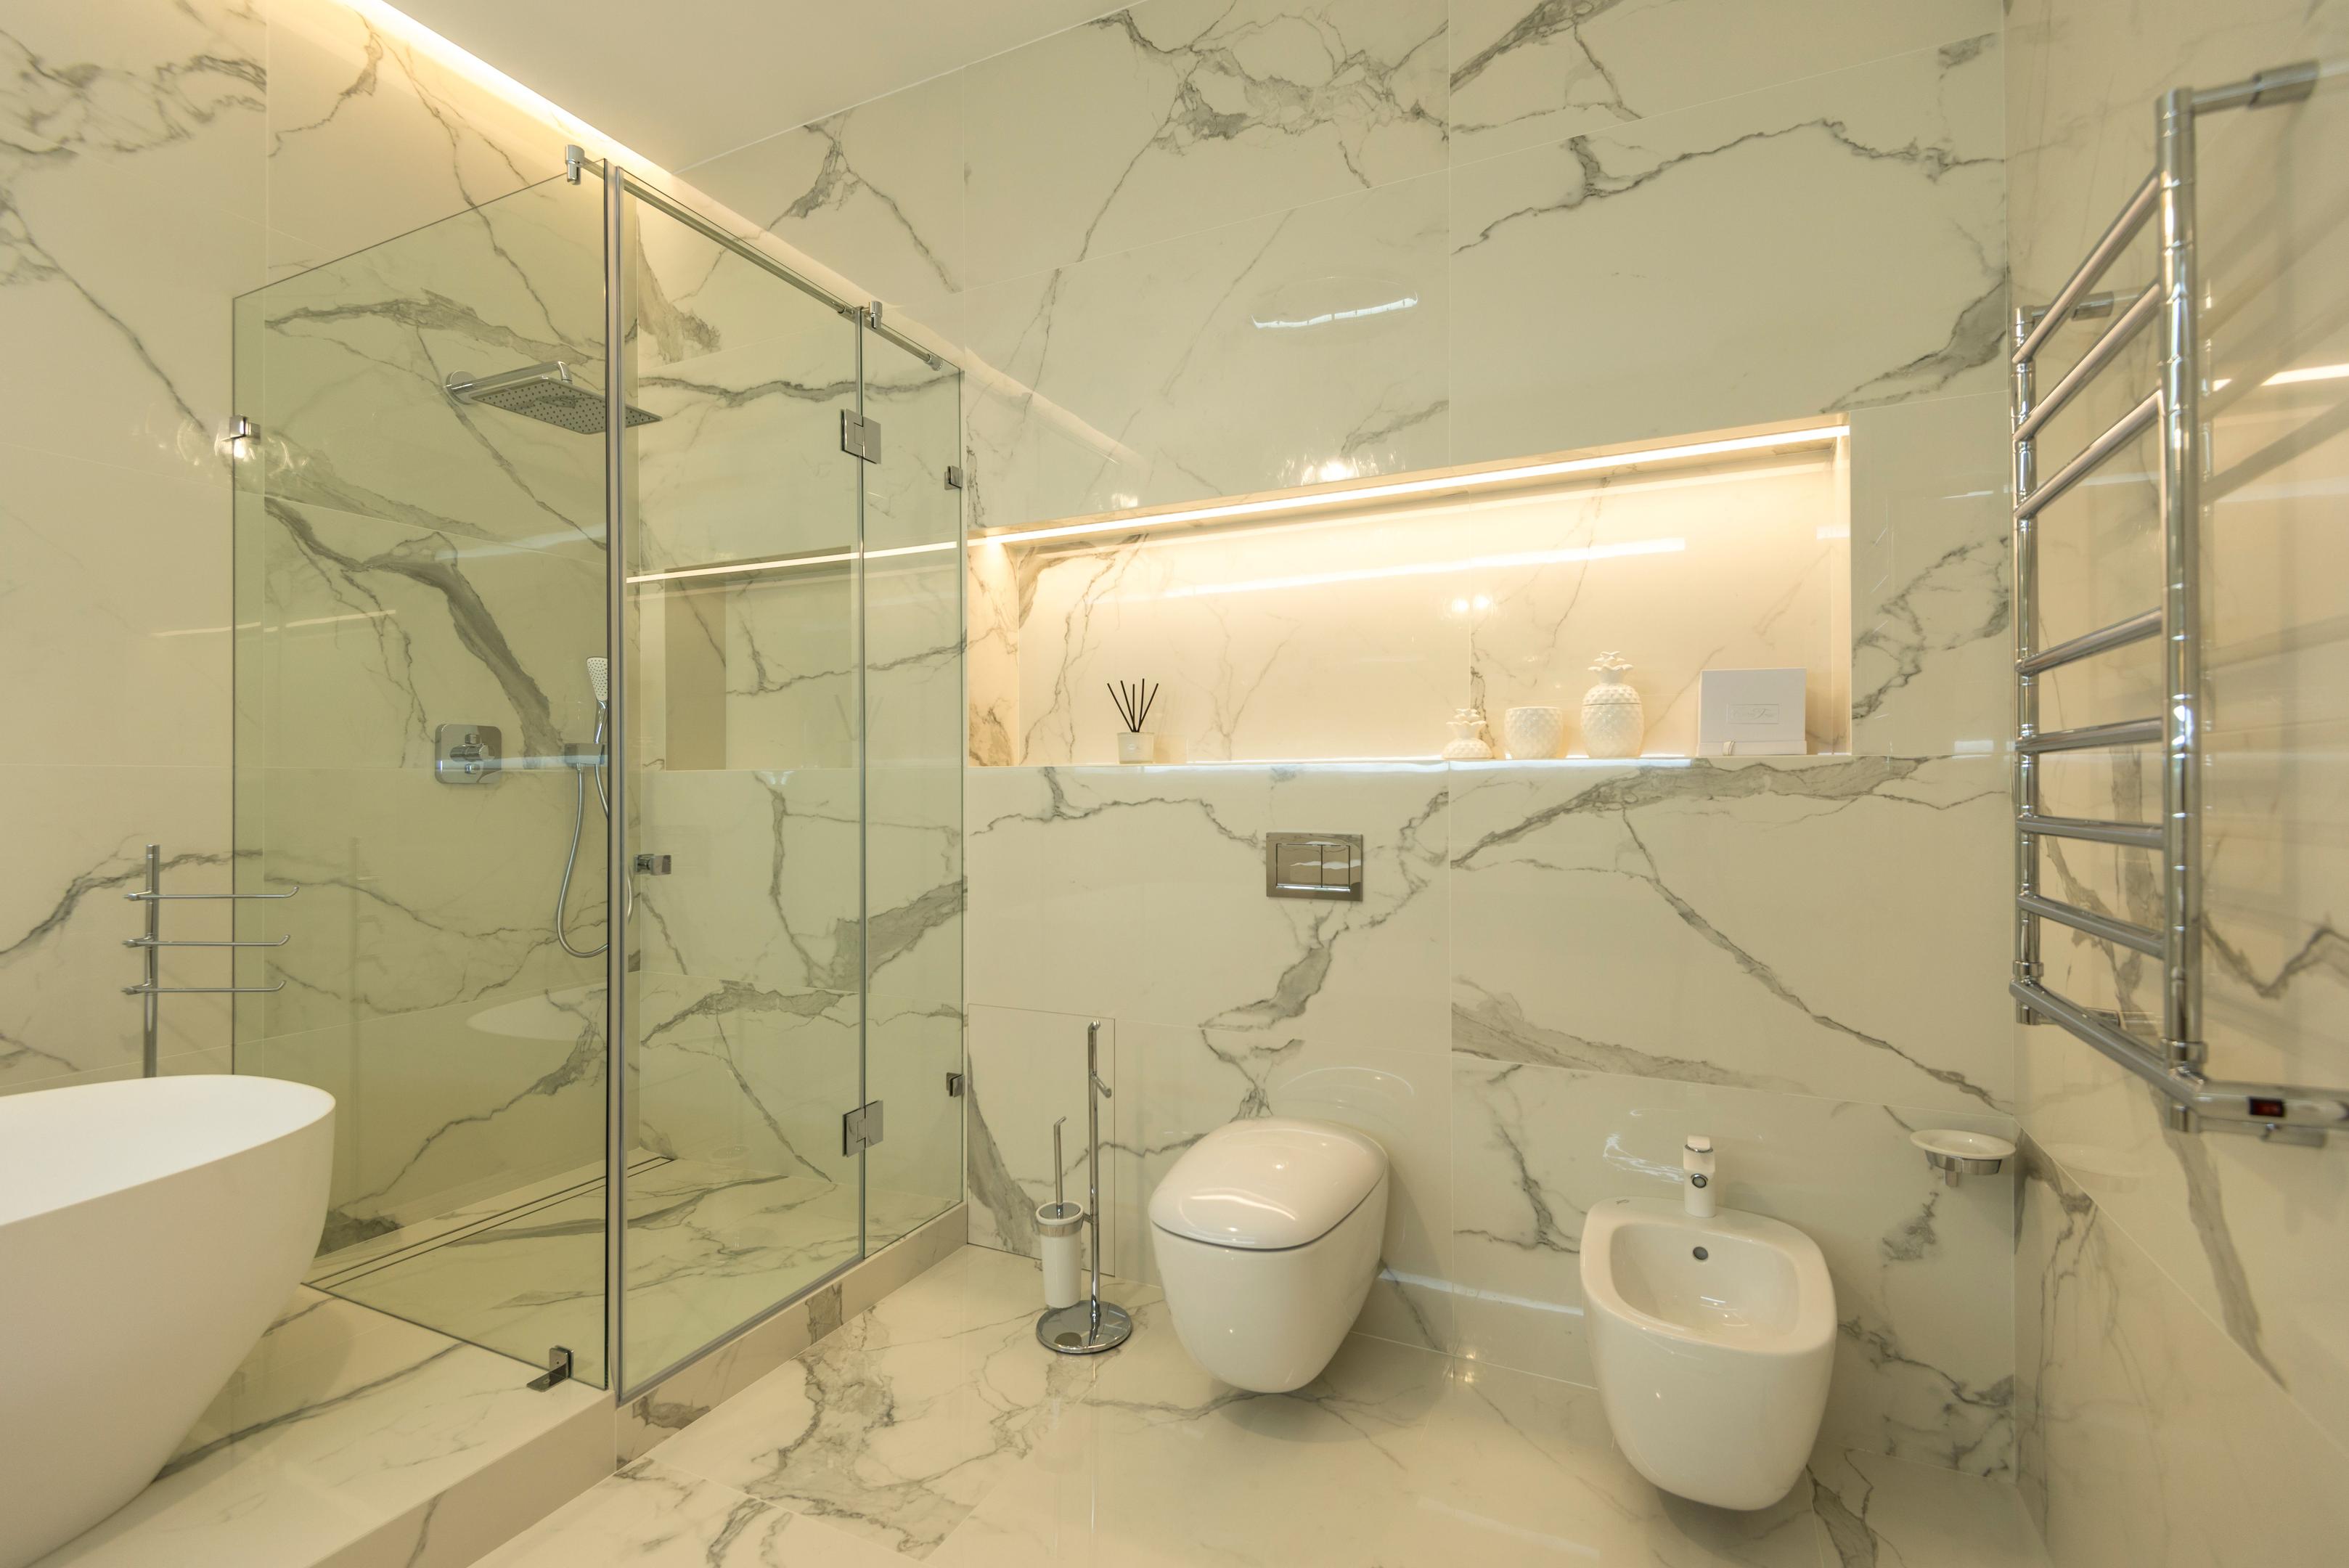
Good task lighting at the mirror is the most practical upgrade you can make. A strip behind or around the mirror lights your face evenly for shaving or make-up. A second strip under a wall-hung vanity makes it appear to float and doubles as a gentle night light.
Shower Niches.
A lit niche turns a storage shelf into a focal point. Set the strip into a tile-in profile such as the Vision TLD Multi Fix LED Diffuser so the light washes down over the back tiles. Mosaics like Blue Savoy look stunning here.
Ceilings, Steps and Floors.
A strip hidden in a dropped ceiling recess gives a soft, indirect glow across the room. At floor level, a step edge diffuser can outline a raised shower tray or bath plinth and makes a safe low-level light at night.
Feature Walls and Corners.
Run light vertically up an internal corner or along the edge of a feature wall to emphasise its texture. EMC’s LED tile trims and tile trim corners keep edges neat, and an L-connector turns a strip through 90 degrees without a dark gap.
The same ideas work beyond the bathroom. A waterproof strip can also light kitchen splashbacks, living-room alcoves or sheltered outdoor areas such as a covered patio, so you can carry one look through the whole house.
Power, Voltage and Protection
LED strips do not plug straight into the mains. They need a driver (also called a power supply) to convert 230V mains into the low voltage DC the strip uses.
Match the Voltage.
Check the strip voltage on the label and buy a constant voltage driver to suit. A 24V DC strip needs a 24V DC driver. 24V systems are popular for bathrooms because they suffer less voltage drop over longer runs than 12V.
Size the Driver by Wattage.
Multiply the watts per metre by the total length, then add around 20% headroom. A 3m run of a 4W per metre strip uses 12W, so a 20W driver is plenty. A 10m layout uses 40W and suits a 75W driver. For damp or outdoor locations, EMC also stocks a 100W IP67 driver.
Watch for Voltage Drop.
On a long run, voltage falls along the strip, so the far end looks dimmer or a different shade. Avoid it by feeding power from the middle or both ends, or by splitting the run into shorter sections wired back to the driver.
Get the IP Rating Right.
The IP rating shows the level of protection against dust (first digit) and water (second digit). UK wiring rules divide a bathroom into zones, and anything in or near the shower must be suitably waterproof. As a guide, IP65 (protected against water jets) suits splash areas, while IP67 or IP68 is needed for anything that may be submerged. Our earlier guide to creating a spa-like bathroom sets out the zones in more detail.
Always keep the driver somewhere dry, ventilated and accessible, outside the wet zones, and have the installation carried out or signed off by a qualified electrician.
How to Install LED Strip Lights Alongside Your Tiles
The neatest way to install LED strip lights is to build them into the tiling rather than stick them on afterwards. Here is the order most tilers and electricians follow.
- Plan the layout. Mark every lit feature on your tile plan, measure each run and decide where the driver and switches will go. Agree cable routes with your electrician before any backer board or waterproofing goes up.
- Fit the profiles as you tile. Aluminium profiles and tile-in diffusers are set into the adhesive with the tiles, so the finished light sits flush with the tile edge. They also act as a heat sink, which helps the strip last longer.
- Cut the strip to length. You can only cut LED strip lights at the marked cut points, usually shown by a scissor symbol every few centimetres. Cut anywhere else and that section will not light.
- Make the connections. Use the right connectors for your strip width and chip type: a connector with a cable tail to feed power, and corner connectors to turn 90 degrees. EMC’s Premium LED Connector with 2m cable tail is designed for its Premium strip. Check polarity, positive to positive, at every joint.
- Clip in the diffuser and test. Press the strip into the profile, fit the diffuser cover, and test the whole run before the final grout and silicone go on.
If you are buying a kit, check exactly what is supplied. Some kits include the strip, driver, plug and controller; others are just the tape. Missing accessories such as end caps, connectors or extra cable can hold up a job for days.
Shopping Smart for Tiles and Lighting
When comparing LED strips, look at the price per metre rather than the headline price, and check the light output, IP rating and colour temperature side by side. A cheaper tape that needs a bigger driver or extra connectors can end up costing more. EMC’s Premium strip, for example, starts at £12.67 for 1m (price at the time of writing), and the matching drivers, connectors and trims are all in the same LED lighting range, so it is easy to pair the right parts.
Finally, buy tiles and lighting with the whole room in mind. A tile that suits a warm white glow and a strip that suits a wet zone will typically give a better result than the most expensive version of either.
Transform Your Bathroom With EMC Tiles
The right tiles give a bathroom its character; the right lighting decides how that character comes across. Choose finishes and colours that respond to light, plan your strips into the tile layout, and put each layer of light on its own control so you can switch from bright and practical to soft and relaxing in seconds.
Ready to start? Browse EMC’s bathroom tiles and LED lighting, get ideas from the inspiration pages, or visit an EMC showroom in Nottingham, Derby or Leicester to see tiles and LED features side by side.