By Bob Howard MBE on behalf of the TTA Technical Committee.
As a Technical Inspector for the TTA, I see many failures which are often a result of poor workmanship, mainly through a lack of basic knowledge and skills required to provide a successful installation. Most of the inspections report on tiling installations carried out by non-members.
One common cause of failure is caused by not achieving a void-free solid bed. ‘Dot and dabbing’ the adhesive on to the back of wall and floor tiles will certainly not achieve this.
I can only assume that one of the reasons why some installers apply this technique is to overcome variations in the trueness of the background. It is always advisable to correct background irregularities prior to the installation of the tiles. However, some dubbing out can occasionally be conducted using the same adhesive. Nevertheless advice on this should always be sought from the adhesive manufacturer, with regards to application and coverage.
Having been in the industry for over 50 years, and devoting my time to ensuring that good practice, training, and fixing standards prevail, I am convinced that the operatives applying this technique have not been properly trained. They are clearly not skilled to an appropriate level of competence and certified by a recognised authoritative body, e.g. The Tile Association.
Typical problems resulting from the dot and dab technique are:
- Grout joints collapsing;
- Load considerations – failure due to the ultimate weight the tile might have to support;
- Voids for water to collect, particularly when tiling externally and exposed to freezing conditions;
- Failure through drying shrinkage of adhesive applied in excess of the designed thickness.
It is often found useful to refer to BS 8000 Part 11 and BS 5385 Parts 1 to 5 Codes of Practice. The purpose of these Standards is to encourage good practice by providing, in a readily available and convenient form to those working on site, the most frequently required recommendations on design and workmanship for building work.
Dot and dab fixing for wall and floor installations is not just common with large format tiles, but also to smaller tile modules.
Large format tiles (ceramic tile with a surface area >3,600 sq. cm, no tile edge <1,200mm) remains a popular customer choice and BS 5385 gives guidance and recommendations for solid bedding, irrespective of the tiles being installed to walls or floors.
The recently revised BS 5385 Part 1 2018: Design and Installation of Ceramic, Natural Stone and Mosaic Wall Tiling in Normal Internal Conditions – Code of Practice was published in June 2018 and clearly makes reference to: “Tiles should not be fixed using the dot and dab technique”. Item 7.2.1.6 of this standard refers.
Item 6.3.1 General also gives guidance: “Tiles with a surface area of less than 0.1 m2, but which weigh more per square metre than 70% of the background’s capacity to carry the weight, should be solidly bedded e.g. the maximum weight of tile that can be supported by Gypsum plaster = 20kg; whereas 9mm thick porcelain tiles, which weigh approximately 18kg/m2, weigh more than 70% of 20kg (14kg) therefore, they should be solidly bedded regardless of their size”. \Following this principle helps to spread the load and prevents loads being concentrated over a small area.
Item 6.2.3.1 General also makes reference to: “Tiles can be bedded directly to a background using an appropriate adhesive as the bed. Methods of application and suitability of backgrounds to accept these methods are described in Clause 7 and Table 3. The surface should be true such that, when checked with a 2m straightedge with 3mm thick feet at each end, the straight edge should not be obstructed by the background and no gap should be greater than 6mm.”
BS 5385 Part 3:2014 Design and Installation of Internal and External Ceramic and Mosaic Floor Tiling in Normal Conditions – Code of Practice also refers:
Section 7 Clause 7.2.1.2.1 Notched Trowelling and Buttering Method: “When floor tiles are fixed using normal cementitious adhesives, the adhesive should be applied to the sub-floor as well as to the back of the tile to ensure solid bed fixing. The mixed adhesive should be applied to the sub-floor using a trowel as a floated coat, pressing the adhesive into the surface before combing through with a notched trowel as a spreading gauge to provide a uniform ribbed adhesive bed. The backs of the dry tiles should be buttered with the adhesive to coat the surface and to fill flush any back profile or key to form a contact layer before placing the tile on the ribbed adhesive bed. Each tile should then be pressed or tapped down firmly into position with a rubber mallet. The adhesive should preferably be trowelled out as straight ribs and tiles should be pressed into the ribbed adhesive bed whilst the ribs are still wet and workable, i.e. within the “open time” of the spread adhesive”.
Note 1: “If pourable floor tile adhesives are used it is possible to fix the tiles in a solid bed of adhesive without having to butter the backs of the tiles. If the floor tile has a deep back profile, then solid bedding might not be achieved unless the back of the tile is buttered.”
“A freshly fixed tile should be lifted to check that the size of notched trowel and the bedding technique used results in no voids being left beneath the tile.”
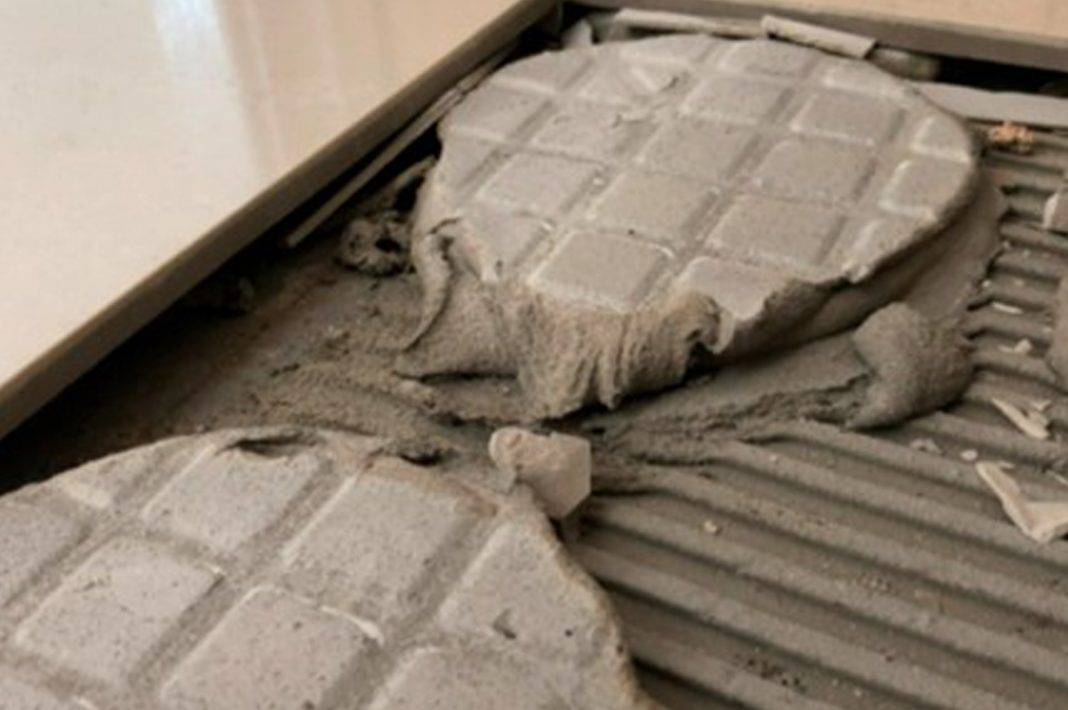
Below are photographs showing:
A. Wall tiles bedded to a wet area using dot and dab technique
B. Dot and Dab build up onto a thinner serrated layer of adhesive
C. Close-up showing voids around the tile edge i.e. the cause of grout collapse
D. Showing open joints as a result of the grout collapsing into voids under the tile
E. Showing a tile correctly solidly bedded
In photograph E the solid bed was achieved by combing the adhesive to the substrate using a serrated trowel in a parallel direction with the trowel held at 45°and applying the adhesive to the back of the tile with the serrations also running parallel to those on the substrate and the tile being pressed and tapped into the adhesive.
The success of all tiling installations is dependent on skilled professionals fixing quality products, which results in a job that the trade can be proud of and where the end user is satisfied.
“Getting it right first time” minimises cost to businesses, reputational damage and client disappointment.
W: www.tiles.org.uk


